From time to time I get asked the question: How do I change the Default Printer in Windows.
Here are the steps for Windows 10:
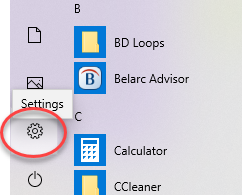
Click on the Windows “Start” icon in the lower left corner of your screen.
Then Click on the Settings icon:
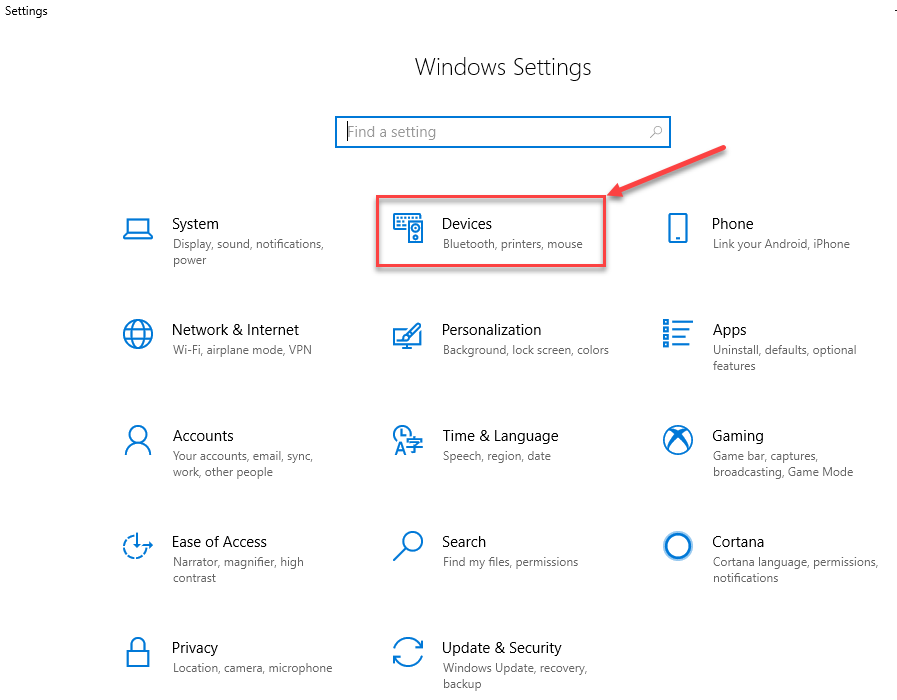
Choose Devices:
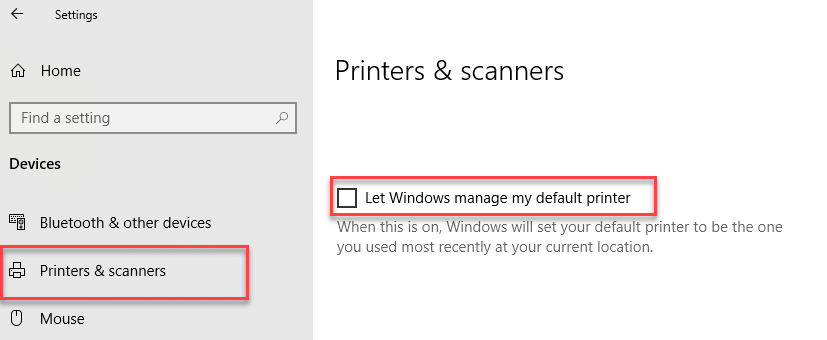
Next Click on Printers and Scanners, then scroll toward the bottom of this page and find “Let windows manage my default printer”, you need to Uncheck this option.
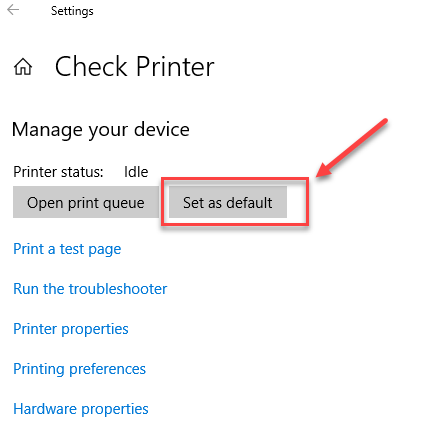
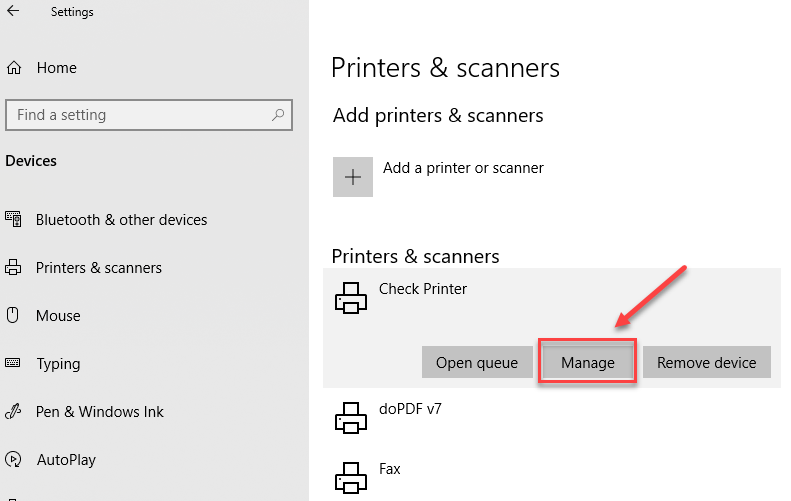
Next find the printer that you want to make the Default Printer, click it and then click the “Manage” button.
You will now see the option “Set as default”, click this button and now this will be your default printer. Once the default is set, close out of all the settings screens and your programs will now use this default printer.